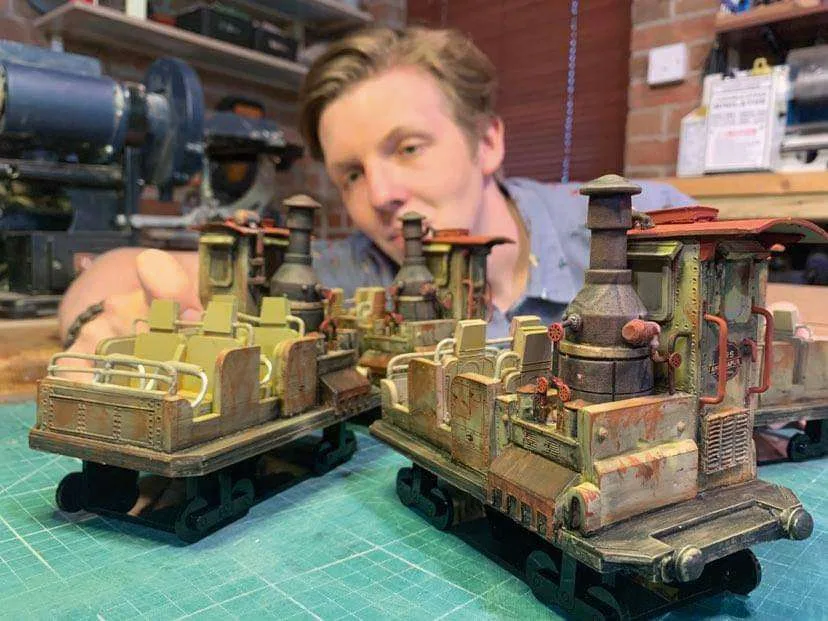
Myself checking the assembled ride vehicles near the final stages
Prop making can cover all kinds of endless areas, from full size costume pieces such as one of Iron Man suits, to Harrods window displays of giant bubbles and the like, right the way to miniatures such as ships used for shots in the Pirates of the carribean films. My next project will involve the latter area as I was tasked to create a range of miniature Exhibition Everest ride vehicles as seen in Disney’s Animal Kingdom at a 1:20 scale. The incredible designers and builders behind any Disney attraction are known by the justifiably exciting title of ‘Imagineers’. These people being some of my greatest inspirations, I was naturally thrilled to have some small involvement in what they do.
Immediately before starting this project I actually invested in a Laser Cutter, which allows me to cut, score and etch any number of materials in a fraction of the time with the added bonus of there being a very exciting and dangerous laser involved! This tool was perfect for the Everest project as once I had carefully researched and constructed detailed plans of the vehicles, I was able to put together detailed schematics which I then file transferred to be cut in 3mm and 1mm pieces after several runs. This covered most of the pieces and I was able to stick together with a poly cement, but there were still many more to come.
I should probably mention that since I aimed to make these models en masse, I would essentially be producing one prototype which I could then go on to reproduce through moulding and casting. When you come to mould parts, it is important to avoid things called ‘locking points’, but in human means you need to avoid having any areas that will be hard to release from the mould once you have cast it. Because of this I had to construct a lot of parts separately in a variety of moulds, such as the chairs so as not to encounter this problem. To make what is essentially a ‘boiler’ at the back of the train/car ride vehicle, I turned it in two parts on the lathe out of an ideal prototyping medium known as Chemi-wood as once finely sanded it takes on a smooth plastic like finish.
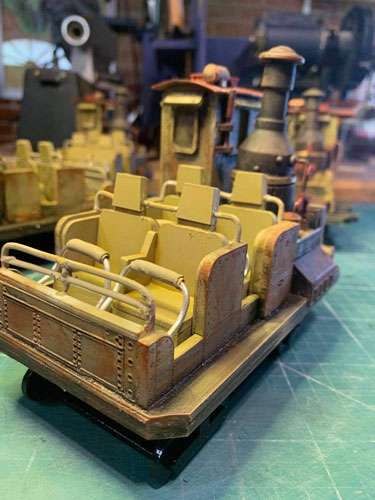
The assembled ride vehicles nearing the final weathering stages
At this point having also hand made a few other small parts that I wished to replicate, it was now time to prep for moulding. The moulding refers to what in my case will be silicone that surrounds the piece we wish to duplicate and casting refers to the product you get from the use of the mould, i.e. the resin I will be pouring in to make more parts. I secured the parts separately on a mould board, grouped in some cases by size,that would allow me to cast several items in a shared mould whilst not wasting any material, I glued together thick card boxes around each of these. Next came the silicone pouring, which once mixed carefully and weighed out, I filled in all the boxes. For the main car, not including seats, I did what’s know as a ‘pour’ or ‘detail coat’ that essentially is a thin layer pasted over the model’s entirety, meant only to capture the detail and not actually any real rigidity. If you were to de-mould at this point, the skin like membrane wouldn’t have any form to speak of and therefore hold its shape, it’s only meant to capture the detail. Once dried I then mixed up another batch of silicone, but this time adding in an agent known as Thixotrope, which can be used to add more viscosity to the mixture and be pasted over the top of the previous stage; picture butter in terms of thickness. I wanted to get this nice and smooth to avoid those pesky locking points.
The main reason for using the Thixo method is to save on silicone, the only downside is to keep its shape it is recommended to make what’s known as a hard jacket to surround to hold its shape, in my case I used fibreglass.
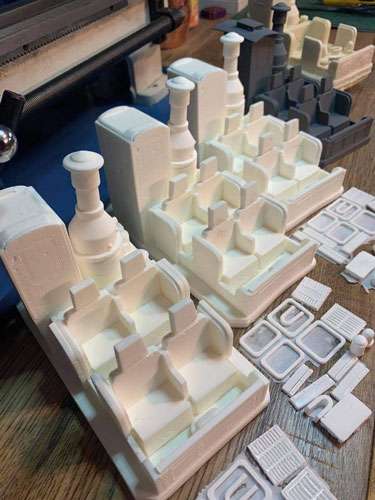
Cast resin parts fresh out of the mounds
Once this was all dry I removed my original pieces and was left with lovely clean and crisp moulds, I was then able to repeatedly pour in fast cast resin, giving me a series of very satisfying ride vehicles ready for fixing together and painting. I also made many small parts out of wire, including lap restraints, safety bars and various piping around the boiler. After a coat of primer, a blend of painting and a dash of airbrushing, it is fair to say the work was looking quite appetising, I also used various dry brushing techniques in order to create the rust and general wear. One thing I actually noticed with the original trains is that the seats were in immaculate condition, probably an effort to avoid the public seeing the ride as genuinely old and dangerous as the story of the ride implies; Disney always strives for comfort and a luxury feel to their rides. The final step of the build was the carriages and wheels which I wanted to be more understated and therefore cut in glossy black acrylic to almost act as a display stand for the detailed top portion.
It was a real pleasure to work on these model replicas and I hope to make many more in the future, a link to my Etsy is below. In the future it would be great to work on a range of other Disney ride vehicles as I find them wonderfully varied and lend themselves well to model making. Being a prop maker you never quite know what the next job will be and what exciting field I may have to delve into next. If anyone wishes to enquire, please feel free to get in touch about any project, it’s always a pleasure to hear anyone’s ideas.
Etsy: www.workshoplagoon.etsy.com
Instagram: christopher_sutton_props
Website: www.christophersuttonprops.com
Email: [email protected]
Phone number: 07412 159179