Making a large scale Dinosaur Model Landscape
As a full-time, self-employed prop maker I regularly have the opportunity to work on some truly exciting and varied projects. Prop making is a vast topic and can span any number of areas, from bespoke items for film and TV such as a ‘Proton Pack’ from ‘Ghostbusters’, all the way to lifelike sculpts that can be moulded and cast in materials such as latex. In this job you really have to learn to adapt and over time, form a vast backlog of processes and materials that you can draw on at any time to best meet what is needed in any given project. Another key area in prop making that happens to be one of my specialties, is Model Making.
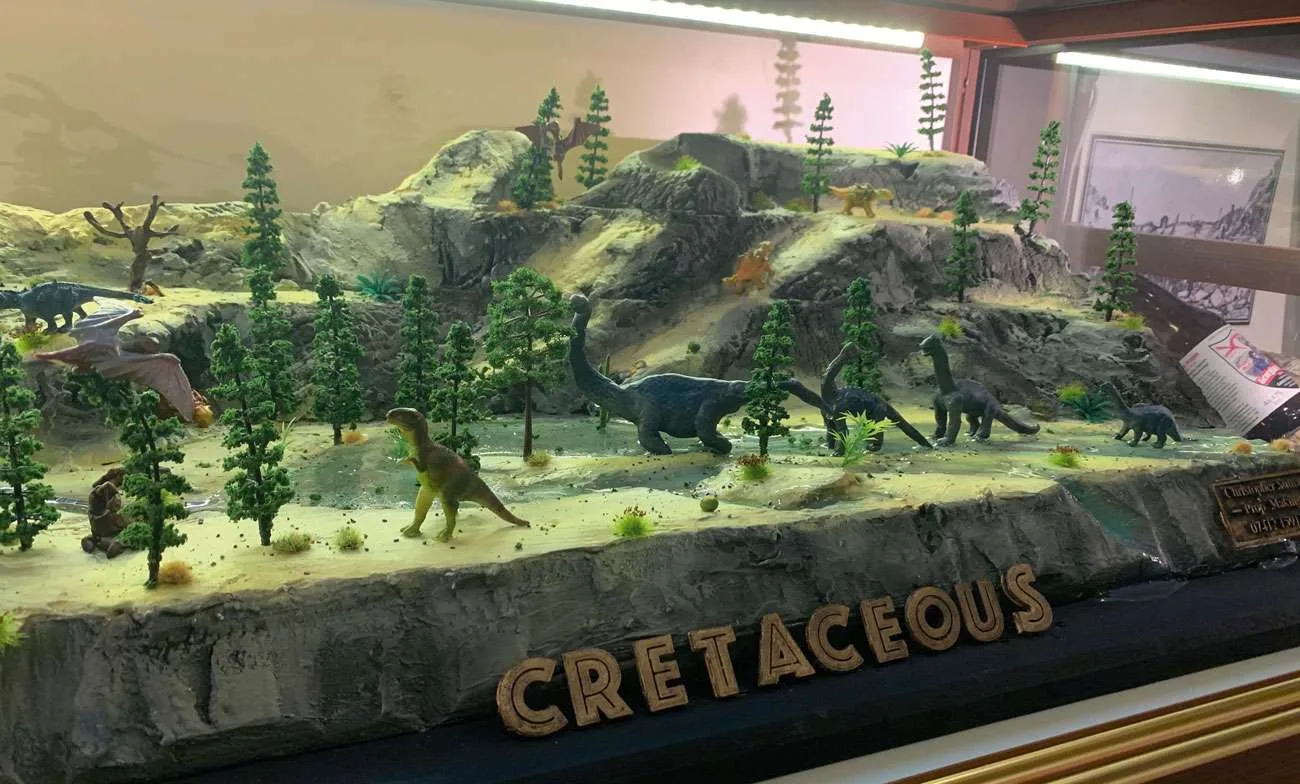
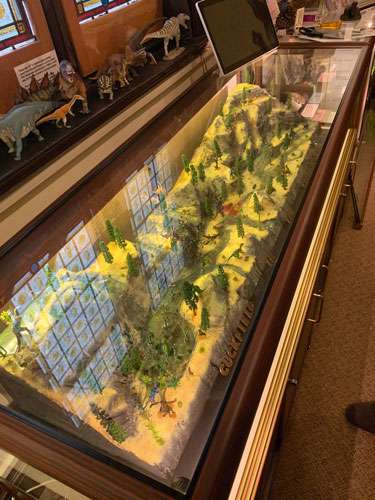
Last year I was asked by ‘Cuckfield Museum’ to make a large scale model of how the local area would have looked over 80 million years ago. This was to be placed in a display cabinet whose previous contents sadly didn’t do justice to the space or draw the attention of children as was the intended purpose of this area of the Museum. Since Iguanodon remains were famously found in the local area, it only seemed right to show just how it might have looked when these amazing creatures called it home. The first step of any project as you may guess, is planning and research! Although this may not sound like the most interesting part of a build, it is by far the most important.

This enables you to see a clear picture of how to best meet the requirements of the piece, in the most effective and efficient way. The required materials can be ordered for each step in advance to meet the wishes and expectations of the client, and hopefully surpass them. After a back and forth on designs with the museum, we reached our final concept and I was able to put together a full plan for the construction of the model and went ahead and ordered my materials.
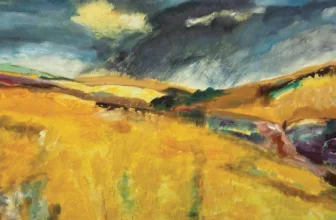
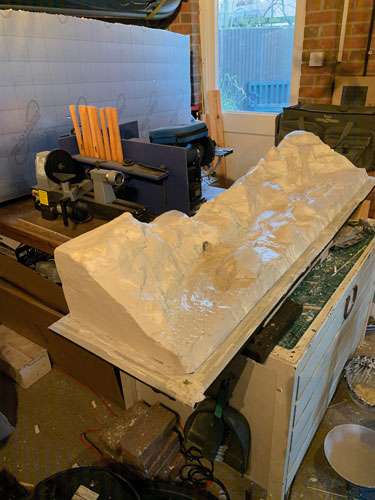
Once everything arrived my first step was to cut and router a wooden base, along with 3D printed lettering on the front. Next I cut and layered up the basic levels of landscape using Celotex foam, this is usually used as insulation but is known for being an ideal material for carving on a larger scale. When cutting foam like this, it’s necessary to picture all of the shapes and forms of the landscape that remain hidden within. From above this method bears some similarity to the contour lines on a map. After bonding the layers together with expanding soft foam I carefully began carving the landscape and valley using a large array of knives. I formed the mountains and rivers with a series of techniques that allow foam to take the illusion of natural erosion, varying through the earth and rocks. Using a combination of glue, filler and plaster I made a mixture that could be applied along with a scrim, to the majority of the model, giving it rigidity and once sculpted into shape, some added form and dimensionality.
For the next step, I used a combination of air brushing along with dry brush painting techniques to give colour to the piece and really draw out and emphasize the texture in the rocks and contours where the water has carved out the earth. Relying purely on the shapes in the carved foam is never enough as the eye may not pick up on all of the curves and edges. Layering darker tones under the light really just draws out what is already there. After this I was able to add in small trees and foliage that fitted the Cretaceous era and use paint effects to blend them naturally into their setting.
Next came the water. For this I used a clear two part epoxy that I painstakingly poured throughout areas of the model, giving the illusion of it gushing down the rocks, into a deep pool and flowing down into a stream. Keeping with the prehistoric theme, I thought I should probably add some small scale, period correct dinosaurs that I painted and positioned appropriately to go some way in telling an engaging narrative throughout the landscape. I added various other layers at this point working into the model, this included rocky scatter materials and final tiny foliage details. Every time you look at the model I hope new details become noticeable, from a watery cave with a creature hidden within, to a nest complete with eggs nestled away safely in the bushes.
In the end I’m pleased to say that Cuckfield Museum was suitably pleased with their model and as the first thing visible upon entry, it now does some justice to the space. Like all of my work I remain proud of the model as it is vital to remain passionate about what you do and maintain a level of enthusiasm going forward to future projects. Overall my main goal was to deliver a final piece that would allow children to engage with the museum and educate them in a way that was engaging and fun. Vitally it also had to go above and beyond the expectations of my client, something that I hope I have succeeded in. Every project, no matter how big or small can always be achieved one way or another and I’m always happy to take on new ones, after a good amount of research! You can find my details below if you wish to get in contact. Outside of museums I also enjoy working on private commissions to be used as display pieces, for collectors and just about anything that means I can continue to adapt and learn new skills. Until the public are able to visit Cuckfield museum in person again, I hope this article has gone some way to show just how much they care about giving visitors the most engaging experience they can and fingers crossed their doors will be open again very soon to see first hand.
Instagram: christopher_sutton_props
M: 07412 159179
E: [email protected]
www.christophersuttonprops.com